My company is going to have a costume contest for Star Wars day
and I’ve been blabla at everyone for years about how I costume for a hobby but
nobody’s seen me do anything. After all, I’m not wearing historical garb
to work. I decided I needed to do something geek-worthy. I was hoping I could
pick something that could be at least partly re-used for another event on the
same timeline and maybe even get a 3rd use at a con.
------------------------------------------------
Goal: Make a recognizable
Star Wars costume
--Need to
be able to drive in it & work in it
--no
handheld props
Deadline: Wear it on May 6,
2019
Budget: Lets see where it
goes but it would be great to stay under $100.
Addl considerations: Use as
much owned material as possible. Track time spent.
-----------------------------------------------
Week 1:
Research ~6 hours
+ Movie watching all
weekend
I haven’t seen the older Star Wars films in years so step 1 was to
Google for Star Wars costumes & step 2 was to watch the entire series to
get into the mood & also see how the costumes I favored worked in
motion. That warranted a trip to the library to get all the episodes at
once, as well as all the picture books I could. I really like Renaissance
inspired shapes & I’m already familiar with the patterning & have
functional support garments so I picked out 2 of Amidala’s court dresses that
had Ren shapes & her velvet security detail uniform as an easy backup option.
1st choice was a gold moire’ gown with blue velvet coat that has a
very interesting collar. I already have a similar outfit in my SCA
wardrobe in the right colors & fabrics so this seemed like an easy recycle.
2nd choice was the peacock dress because I have
yardage of the right color shot blue taffeta and I love the hair. It also
looked like something I could re-use easily.
3rd choice the copper velvet security uniform because
it looks easy & would be something I could get a decent amount of re-use
out of with minimal time invested.
---------------------------------
I couldn’t find either dress in the films. Uh-Oh. More
Googling. Dress 1 never made it into the film, and dress 2’s scene got
cut despite it was in all the pre-release publicity, even to the point that
Simplicity released a pattern. I found 2 websites with excellent information
including the design notes and the only photos I was able to locate of dress
details. I have enough info now to do a decent copy, so I’m going to go for #2.
It’s a blessing and a curse to find photos of swatches because you find out all
the detail the photo & long camera shots didn’t give you. Also, the design
notes tell me that the photos pixeled out some important fabric details. This
is going to be more work than I originally hoped for because there is
SMOCKING. I picked up a smocking machine at an estate sale last year
& this will be a chance to try it. Also, except for the designer’s
basic description, we don’t know what the dress looks like, because it’s always
under a coat. The Simplicity pattern doesn’t follow the designer’s description
(I was able to see the line drawings & layout in someone’s Amazon ad, $60
ouch) so the pattern can be disregarded. I’m starting from scratch.
Week 2: Create materials
list, sourcing, map out the project
2/17-20 Made & fine
tuned a list of all the things I think I’ll need based on design details &
past experience. ** Making the BOM & decide on dress design 4+ hr
2/21 PM Unearthed all the owned things from my studio so I know
what’s on the shopping list. The 2 most important items I don’t have are
patterned velvet for the coat, and the wig.
** Finding all the owned
stuff ~2 hr
2/22 Shopping day
(woo-hoo!) A somewhat local wig shop (McMinnville) had a reasonable wig on
their website so I made a trek there to see what it really looked like.
Excellent find & clearance priced.
The clearance fabrics section of the local JoAnn yielded an
interesting patterned velvet, not swirly like the original but random enough
for a copy and it’s linen-cotton so I should be able to dye it to the right
colors.
I found a cotton sweater at goodwill that mimics the texture of
the snood. Another dye project. I’ll also need to dye the canvas
I’m using for the coat edging.
I had black leather to use for
the headpiece but it was pretty stiff so I got some synthetic at JoAnn which
might work better, just in case.
Lucky accident at the dollar store, the Easter baskets they were
unpacking have a remarkable resemblance to the pattern of the top of the headpiece.
Bought a few of those.
Also bought pin backs for the brooch and an assortment of cheap
kids’ pony beads that included some browns. I have beads but I didn’t
have quite what I thought would work. It would be easy enough to paint over
what I have to save $ but for 5 bucks I don’t need to mess with painting.
**Shopping 9 hr (This went well & I’m feeling lucky! I
have everything I need in the first round. That NEVER happens.)
NOTE: Photos of the actual film dress are not mine, they were
printed out from other blogs and may be copyrighted by Lucasfilms. To see
better versions, more info, and citations go to these sites:
----------------------------------------------
I Have A Plan (not necessary to execute in this order)
Dye Velvet & Other Textiles
Make Brooch
I decided to reproduce the brooch using Sculpey clay, since I had
packs in blue, black & bronze. I needed to buy the pin back. I
considered baking loops into the back & sewing on, but some photos of the
coat show it without the brooch. I should be able to cut the design into
the clay using carving tools & a printout of the brooch design. From
photos of the outfit I estimate it’s about 1.5 inches across. I’ve
printed out photos in multiple sizes so I can cut them out & see what looks
best. Other methods to reproduce would be to cast in plaster, carve out of soap
or wood, paint pretty much anything, or 3-D print it.
Make Headpiece
I’m planning to make a frame from heavy floral wire & cover it
with buckram, then glue the black materials to it. The baskets I got will
need to be cut up & painted to a bronzy-metallic. I should be able to
sew them on top of the black headpiece & glue the blue beads on.
Make Snood
I didn’t find any good closeups of this. It appears to be a
beaded bag, probably made from a beaded scarf with quite a bit of
texture. I liked the look of lightweight boucle’ knits but only found
them in synthetics, which don’t dye well. I got a reasonably similar texture in
a knitted cotton sweater. If there is excess time I can add beads later
but that is a time-consuming detail that I’m not concerned about.
Add Beads & Snood to Wig
I have gold springs to
mimic the metallic beads & brown pony beads. Should be able to pull the
curls through the beads with a fine crochet hook, or wrap the tips of the hair
in foil & thread them on like a shoelace. Past experience with beads in my
own hair says I might need to glue them to hold in place.
Make Hooped Underdress
I have multiple sets of hoops but taffeta is lightweight &
likely to show hoop lines unless I wear layers of petticoats. The original
dress is Fortuny-pleated and has very crisp vertical lines. I’m not
pleating the skirt so any understructure will show. The original design
called for a quilted, hooped petticoat & there are online photos showing
it’s Empire-style. I’m electing to make a new one that works with the
fabric since I don’t have one that type. The quilting will give the dress some
real support without sagging between the hoops. I have a garage sale
comforter that I tore apart, and it seems to be all
cotton. I’ll put the color to the inside (it’s pink) and do the face
surface in white cotton. That will make it re-usable for other historical
costumes.
Make Dress
The big trick here is the smocking. Yoked turtleneck, Empire
waist, A-line skirt, bishop sleeves, long Victorian cuffs with dangly bead
trim, double row of beads top of collar. If it was cotton it could be Gunne
Sax. The design notes say yoke is smocked, front is smooth. Photos show smocked
cuffs, Fortuny pleat sleeves. You can’t see the sleeves above the elbow. You
can’t tell from the photos that the neck is smocked because the pixel-expansion
makes it soft, but once you know what you’re looking for the indicators are
there. No idea what shape the yoke is BUT there don’t appear to be any seams
above the coat closure…I think the designer visualized the dress as a blend of
a period gown plus chemise. That’s close enough to the shapes of
Simplicity 8735 that I can use it as a starting point. I’m going to put a zip
in the back & line the bodice & cuffs so I can support the smocking
& also to protect the fabric & give it some weight.
Make Coat
Once the velvet is dyed this is a couple lined layers with made
edge piping (there was a swatch, heavy grain like canvas, unclear what color
because it appears blue in some photos, gold in others, and mostly disappears
in the distance shots). There are beaded tassels on the points, not sure yet
how I’ll handle that but I have small black tassels & could also do them in
yarn or possibly beads, or leave them off entirely. The lining swatch for
the original is copper taffeta. I have plenty of black suit lining so I’m
using that. The real coat has all the edges decorated with couched
cording. I’m not even going to try & duplicate that. It’s a
year’s worth of handwork. If I had an embroidery machine, maybe, but you
can’t see it at all in the distance shots. A lot of work just for the HD
camera in case of a single close-up. My biggest concern is there might
not be enough velvet. I got all there was, so I’ll have to pattern to fit
the fabric.
Shoes?? Stockings??
The design notes call for brown court shoes (unseamed pumps) 1.5”
heel & knee-high nylons, so it’s apparent they never expected the feet to
really show. I have a pair of brown buckle shoes & a pair of dyeables
pumps that could be made brown. Also a pair of satin beaded ones in a
bright peachy color that are the perfect shoe but wrong color, possibly
dyeable.
-------------------------------------------------------
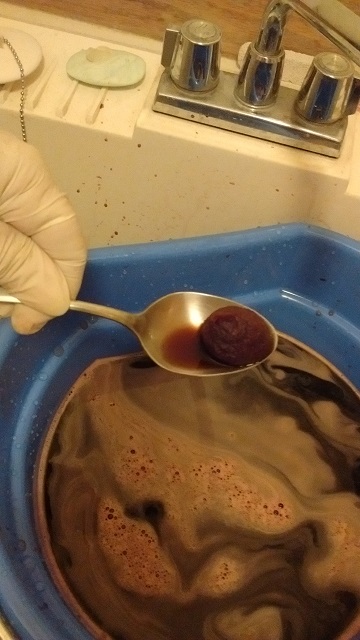
Dye Tests
The fabric content of the velvet is SUPPOSED to be linen &
cotton but I never trust bolt labels on clearance stuff. Dye test looks like I
can get the look I want. The backing needs to pick up some blue color
& the pile needs to be dark coppery brown. I painted dry dye powder
teal & peacock onto the back of a scrap saturated with dissolved soda ash,
let it sit a couple hours & washed it out, then dried it. Once it was
dry I soaked it in soda ash again, sprinkled some brown on the velvet side, let
it sit for a few minutes & washed it out. The pile is more resistant
to coloring but it did pick up some color in the short time there was dye on
it. I think by laying the fabric out flat dye side down & doing it in
2 stages I can minimize bleeding between the colors. I’ve never dyed big pieces
without a ceramic bathtub and a spray to rinse with, but my new house has
fiberglass baths that I don’t want stained. My great idea is to put plastic
all over the garage floor & flat dye 3.5 yards on the floor. I don’t
want to soak it so that the pile takes the blue dye so I’ll paint on the colors
with a brush or sponge and trust gravity to keep it from wicking up too
much. An interesting experiment at least.
 |
| Fiber Reactive Dyes |
 |
| Velvet Dye Test Back |
 |
| Velvet Dye Test Front |


