Sunday, April 28, 2019

Amidala's Coat, Part 2


After yesterday’s machine adventures I have a lot of time to make up. Thankfully, today went smoothly with only minor adjustments; had to debug the collar, but it’s ready for the trim & finishing.  Now that I’ve cut the points in & pinned everything, I wish I was taller!  Just taking a quick break to get a couple photos & back to work. Sewing time (so far) 8 hours including pinning, trimming & pressing in edges.


Saturday, April 27, 2019

Guts--Another Best-laid Plans Kinda Day


Machine guts took over my morning. I decided last night that I’d get up early & focusfocusfocus on making the coat today. Got up at o-dark-thirty, set up a serger—and spent 2 hours fussing with it trying to get the adjustments right before I decided to switch sergers. 
Temperamental critters are sergers. Folks don’t seem to know what to do with them so they dump ‘em at garage sales after a frustrating adjusting experience. I bring one home occasionally as a project. Current inventory is 4 so you'd think at least one would be plug & play! Sergers are great if you know how to use them. I got my first one brand new (first-gen home Singer) in the early ‘80s and it’s been my workhorse all these years, but it’s become impossible to get good replacement parts for the things that are worn out and I’m always looking for a similar one for parts.  I can coax it to work but the cutting blade is useless. My backup is a low-end Brother that I got in trade & that is the one I was fussing with earlier. It’s more of a beginner machine & is usually forgiving.  Last year’s garage sale finds included a lovely Janome that the original owner failed to oil out of the box & is seized up. [side note, this is common because they ship them pretty dry & the manuals all say oil before use. Nobody reads manuals.]  I’m determined to make it work because I’d never spend that kind of money on myself & it feels like a treat. #4 I paid $5 for at a garage sale over the holidays and that is the Huskylock I have just spent a couple hours cleaning and oiling because I was tired of fighting the adjustments on the Brother.  This one is new to me & I’m happy to report it’s now fully functional.  Of course, part of the process was to soak the poor dry guts in oil & let it sit a while, so I’ve fussed around much of the morning cleaning the aquarium & starting a pot of ribs for dinner while I waited for the oil to do its work.  I expect the one I started with would like an oil & clean now too, and that might magically help with the adjustments. It's a mixed blessing to be able to repair my own machines.
Now I’m blogging & having lunch while I try to get back into the project frame of mind I had 6 hours ago.  The sun has come out, and I need to mow the lawn, and my kitchen smells of ribs, aquarium, and WD-40, which is kinda weird. 
Huskylock guts, nice & clean. It really needs sewing machine oil, but the spray tube on WD-40 is good for getting into tight spots.

Tuesday, April 23, 2019

Amidala's Coat, Part 1


Nothing is constant but change.  This week’s adventure: the coat!

Abandon the dyed velvet
You may remember that I didn’t have much of the velvet (about 3.5 yds) & wasn’t sure how much piecing I’d be able to do.  In the spirit of using what I had, the default was going to be to do the under layer in black wool.  Lucky me—I took a little trek to the Pendleton mill on sale day & scored 7 yards of an interesting textured jacquard that at $3.99/yd was a reasonable sub. I wasn’t happy with that velvet anyway, after all the effort to dye it, so it was nice to find a cheap alternative. The new wool is rusty copper & black. No peacock blue, but the black at least gives a similar effect and the copper isn’t too far off some of the internet photos of the original.
New wool jacquard
Patterning this wasn’t complicated because I had a couple good bought patterns to start from. From a Civil War era coat I got a front, back & collar. From the latest in caped suit jackets I got the ¾ cape. I tend to cut freehand with some basic measurements once I have the shape I want. I laid the pieces out on the fabric & it was pretty obvious that no-way was there going to be enough velvet for all the sections even with complex piecing, so that went upstairs & I rolled out the new copper stuff.  I do love Pendleton! Once the pattern pieces were laid out I checked/fixed measurements & re-drew the shapes on the fabric in the correct sizes. I’ll fine tune the point shapes when I have it partly sewn & on a dressform. I have 2 fronts, a back, a cape front & side, and 2 collars cut out.  That took the whole 7 yards with just a little scrap that I will use for armhole facings. The canvas strips that I’d dyed with the original blue for piping went into the vat to become brown.  The sewing machine is ready to go with brown thread & I just need to decide if I’m going to line it all, or serge the seams so it’s a quick job.  The original has piped edges. The fabric is heavy, so I’ll have to see what happens when there’s a hem and piping, or a binding—the bulk might be awful & too stiff and I might abandon that. That’s for another night. For now I’m happy to get the blog caught up. Honestly it takes longer to make the blog layout work than it does to create the thing!  

Yes, I could have made the pattern a month ago then shopped for fabric, and maybe even found something.  Or I may have loved the velvet enough to just go with using 2 fabrics.  I wanted that blue backing!  I could have re-designed the coat to have a single layer. I saw online one cosplayer did the coat in bright pink. It’s all random. 

Patterning & cutting: 4 hours

Amidala's Headgear


Wire frame, not much bigger than a commercial hairband
Another story of things taking longer than planned.  The headgear is taking forever! I’ve been working on the wig & headpiece in 30-minute bursts for over a week.  Mostly it’s been about glue & paint drying but the learning process has been interesting.  I knew I needed to cover the headpiece with leather or vinyl, but I wasn’t sure how bulky it would need to be.  Getting it to curve right was the biggest challenge so I approached it like a hat—bend & wrap heavy gauge floral wire into the shape then cover it with buckram to stabilize the shape, then cover that with vinyl.  The leather I had was just too stiff to work into complex curves so I used the much lighter weight vinyl.  I fussed with floral wire a couple hours including the medallion shape, then excluding it.  Some of you will recognize the end shape—the Ah-HA moment was when I realized I was making a French hood with the frame turned backward.  I should have guessed that before I started, with all the online info about the designer’s inspiration being Tudor.
Laying on the wet buckram
Ready for leather
Once I had the frame made the buckram had to be wet & wrapped, then that dried overnight.  Then another layer because the thin vinyl showed the structure & I wanted it to look smooth.  By the time I’d put a couple layers of buckram on & let them dry, then glued on the vinyl, the weekend was over & the thing was much bulkier than I wanted. 
During the drying breaks, I used aviation snips to cut up the plastic baskets. The design was a great match but the plastic was so stiff that it was going to be awkward to work with & would take a lot of stitching or structure to keep in place, which would show. It needed to follow the curve of the head even with the headband & hair bag under it so I decided to try heat to slump it into more of a head shape. I did some experiments with the heat gun (too much heat at a focal point, also melted the styrofoam head) and in the end what worked best was to set the plastic pieces on a stainless steel bowl in the oven on a lower temp & pull out the bowl as soon as the plastic drooped, being careful not to disturb the plastic until it cooled. I did that a few times in stages so that the thinner pieces didn’t just melt into blobs. Then the pieces of plastic had to be painted, then sewn together, then painted a couple more coats mostly to hide the thread. The whole assembly was glued to black vinyl & when it dried the edges were trimmed. Then all that was glued to the headband.  Downside of the vinyl: it was backed with white fuzzy stuff, so you could see all the edges. I blacked those out with a sharpie.

Repurposing dollar store desk organizer baskets
Pretty darn close!


The dyed sweater was cut into 2 long slightly rounded rectangles with the inside one slightly smaller than the outside.  I sewed up the edges to make a bag then pinned it to the wig & cut the lower  bag opening  edges & stuffed curls in until it looked right. The outside piece being bigger hides the stitching.  I strung beads & sewed them into the wig backing. 

Now that I know what it looks like I’d probably build the assembly on a headband & use the kind of leather you can soak & mold, cut the band & medallion in one piece, soak & shape it like a mask, then spray it black. Getting the scale right was the tough part—I kept expecting the sides to be bigger. The little curve insets at the wide ends were about the width of a pencil.  It’s not as close to the original as I’d hoped for, but will pass the 10-foot rule nicely.  You can see I need some fine tuning to get the bag sewn into the wig at just the right spot, and to get the beads to stay on top of the hair, but it’s almost done. If I have time at the end I may iron out those front curls & fix the bangs.  The last step will be to glue on the blue beads for decoration (so they don’t come off in handling).
I failed to keep up with the time, but a good guess would be ~10 hours of actual work spread out over a week so far.
It doesn't look like it took a week!

Saturday, April 13, 2019

Petticoat Junction


I’m glad I had 8 weeks to do this because I’m down to 4 now & just getting into the hard part!

Before I can pattern the dress I need the undergarment. I’ve never had a quilted petticoat so I’m a little surprised at how HEAVY it turned out, but overall the effect is exactly what I wanted. I guess if you wear a blanket under your clothes it weighs what a blanket weighs (this took most of a twin bed comforter).  It definitely pulls on the shoulders. 


The fully lined petticoat is 2 layers of lightweight cotton and the skirt has an inner layer of cotton batting that stops just above the natural waist. I used the top of an old quilt for the inside and printer's cotton for the outside.  The batting smooths out the hoop lines so the dress won’t show them.  The hoop casings are on the inside layer & made of lightweight cotton waistband interfacing. I wrapped double fold bias tape over the  bottom to give the edge extra stiffness. I didn’t have enough spring steel for 4 hoops so I made the bottom one out of some salvage nylon cable stiffener I’d been saving for a corset experiment. That stitching about 2" from the bottom is to keep the 3 layers of skirt lined up.  


Inside casings
Hem casing


Time spent on the petticoat: 14 hours including pattern, cutting, fitting, sewing & a quick trip to JoAnn's for bias tape. That's more than I expected but I'm out of practice.


1/2" Spring steel is good for hoops. It comes in different weights & it can be cut with aviation shears or tin snippers.  The ends are sharp & need to have the corners ground off.  I dip them so they don't snag on the fabric.  Tool dip is easy to use, cheaper than the stuff they sell "just for corsetry" & even comes in a spray version.
Hoopskirt tools

1/2" Spring steel after grinding. Then I dip the tips so they don't snag on the fabric.

Random nylon stuff for lightweight boning

A Good Day to Dye


I have ~3 yards of abstract textured velvet, and it’s supposed to be linen & cotton, which means I should be able to dye it.  The backing needs to be peacock blue & the pile needs to be a coppery brown.  Dye tests on a swatch were promising and it’s the only thing I found in local fabric stores that had a good texture and at least a usable color. 3 yards isn’t enough for all the coat panels, but I’m hoping to piece the lower ones so they look like whole panels.  Meanwhile I’m keeping an eye out for other options. 

The fabric was machine washed in hot water and dried multiple times to remove any finish & soften up the fibers.  I did this over a few days so it would be ready when I got a dry day to work outside.  I don’t want to get dye all over the bathroom, instead I’ll roll out plastic on the patio & paint the dye on, then let the fabric sit in the excess liquid.  I can roll that up & rinse in the laundry sink before doing final rinses in the washing machine and hopefully keep the dye out of the house.

Finally got that dry sunny day so…

I need to dye the cotton sweater to make the snood, as well as the velvet.  Both need the coppery brown.  The velvet needs the peacock backing done first, then the brown pile.
Chemistry lab

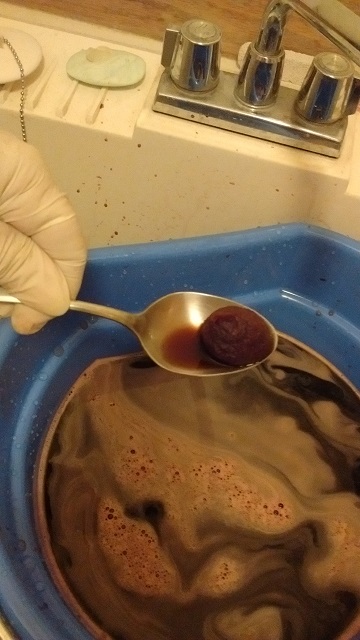
Using cotton ball for color check

Stirring the dye
I decided to vat dye the sweater, so I mixed up Procyon with salt & soda ash in a bucket.  I have a range of dye powders so I did a pinch of this & that until the color was what I wanted. Vat dyeing needs constant stirring or it will streak. I wanted the color to be uneven, so I didn’t stir it much.  I left the sweater in the bucket about 4 hours, then rinsed it & hung it to dry.  I wanted it darker so I put it back in for another couple hours, rinsed & dried again.  The peach sweater is now a rich textured brown. 


Brown-after
Peach-before


I rolled out plastic on the garage floor & rolled up the doors. It was sunny out but windy, so working inside seemed like a better idea than the patio.  I put the fabric back-side to the floor because I wanted to keep the blue out of the pile as much as possible.  I mixed up the dyes in buckets, folded the fabric in half longways & brushed on the blue dye one half at a time with a big nylon brush. Once the fabric was saturated I put it back-side down to soak in the drippings.  After a couple hours the blue looked nice & dark & the fabric was only damp, so I flipped the fabric over & did the same thing to the pile side with brown.  I wasn’t worried about the colors bleeding into each other, that would make it more interesting. 
Ready to paint on dye

First half of peacock blue 

Viewed in the sun, the pile didn’t seem to be taking on the color very well. There’s a silvery-gray sheen to it.  I painted layer over layer until I ran out of brown dye but it seemed like the dye wasn’t changing the pile color much at all.  Then when I rinsed, both colors rinsed out more than I wanted them to.  O well, that’s the breaks.  Just I case, I pulled out a can of brown spray-on upholstery color & sprayed some on.  It makes the fabric stiffer, but it doesn’t wash out.  I’m still open to better options, but I have a day tied up in “making” the coat fabric now (and I don’t know yet if I have enough to fake the parts I need because I haven’t created the pattern).
Velvet before

Velvet after

Finished piece in the sun with the taffeta. Cotton rag picked up that much brown from wiping my gloves, velvet should be the same color!

Amidala's Brooch


You know how every project takes on a life of its own & grows into something daunting? I thought I’d start with the brooch. It’s a little thing & seemed easy to create. I printed out different sized pictures, rolled out Sculpey on wax paper, cut out the shapes like a batch of cookies, and tried to transfer the design.  I tried pressing it in with various tools, drawing on the clay freehand, punching outlines with pins, I even baked the photo onto the Sculpey but I wasn’t happy with any of it.  The design was too small to do well in the soft clay. I had some other ideas including using the Dremel to clean it up after baking & printing it really large on shrinky-dink plastic, cutting it out, then shrinking it down & gluing on a clay cookie and making a casting mold from that.  I kept wishing I knew how to model for 3D printing. Most of an afternoon later I decided to put it aside & work on something else.  Honestly, for a costume I could have glued the picture on a clay slab & that would be plenty.  That doesn’t satisfy my obsession with details.

Using pin to poke in the design through picture

What it looks like after the paper is peeled off

Some of the better results, printed photo is the far right--YUCK!

2 weeks later I was surfing for close-up photos of the dress sleeve & stumbled on a blog that talked about a woman who 3D printed Amidala accessories, which led me to a website that 3D prints cosplay parts.  Sigh. Here’s the printed one before & after I sprayed it with metallic paint I had in the garage & thank you Shapeways. It cost about the same as 2 blocks of Sculpey.  Bottom line, if I’d thought to look for 3D printing first I’d have saved a day of frustration. That’s the way this hobby works—there are so many directions you can go to solve the same problem, and it’s all up to interpretation anyway.


Raw plastic brooch & pin
Finished plastic brooch. Not quite the right color, but it's the paint I had